Swagger의 사용
DTO
단일 Object에 사용
export class CreateCatDto {
  @IsNotEmpty()
  @IsString()
  name: string;

  @IsNotEmpty()
  @IsNumber()
  age: number;

  @IsNotEmpty()
  @IsString()
  breed: string;
}
이전에 만들어 놓았던 dto에서 swagger를 사용해보도록 하겠습니다.
export class CreateCatDto {
  @ApiProperty({
    description: "The name of a cat",
    example: "Kitty",
    required: true,
    type: String,
  })
  @IsNotEmpty()
  @IsString()
  name: string;

  @ApiProperty({
    description: "The age of a cat",
    example: 3,
    required: true,
    type: Number,
  })
  @IsNotEmpty()
  @IsNumber()
  age: number;

  @ApiProperty({
    description: "The breed of a cat",
    example: "Scottish Fold",
    required: true,
    type: String,
  })
  @IsNotEmpty()
  @IsString()
  breed: string;
}
이렇게 만들어놓으면 아래와 같이문서가 바뀌었을 겁니다. 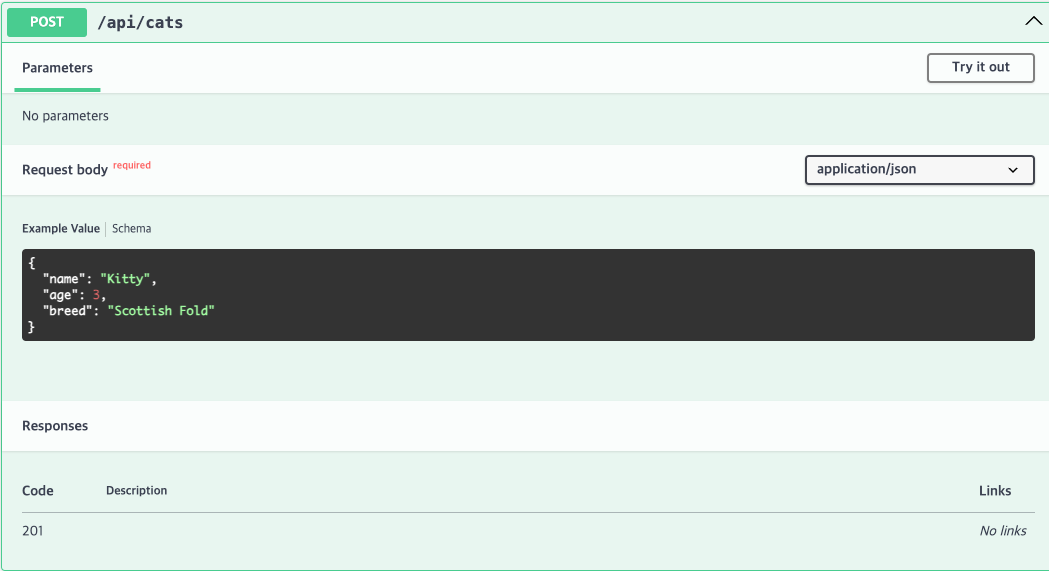
create를 만들었으니 update도 똑같이 하면 되겠죠?
그런데 코드가 중복되는 것을 볼 수 있습니다.
코드의 중복을 줄이기 위해 코드를 좀 변경해보도록 하겠습니다.
import { ApiProperty, PartialType } from "@nestjs/swagger";
import { IsNotEmpty, IsNumber, IsString } from "class-validator";

export class CreateCatDto {
  @ApiProperty({
    description: "The name of a cat",
    example: "Kitty",
    required: true,
    type: String,
  })
  @IsString()
  @IsNotEmpty()
  name: string;

  @ApiProperty({
    description: "The age of a cat",
    example: 3,
    required: true,
    type: Number,
  })
  @IsNumber()
  @IsNotEmpty()
  age: number;

  @ApiProperty({
    description: "The breed of a cat",
    example: "Scottish Fold",
    required: true,
    type: String,
  })
  @IsString()
  @IsNotEmpty()
  breed: string;
}

export class UpdateCatDto extends PartialType(CreateCatDto) {}
NestJs OpenApi Mapped Types
parialtype은 validate를 모두 optional로 변경해 줍니다.
이외에도 골라쓰는 PickType, 원하는건 뺴는 OmiType, 두개를 합치는 IntersectionType 있습니다.
Object가 List로 요청이 온다면?
프로젝트를 하다보면 데이터를 받는 여러가지 경우가 있습니다.
많은 데이터를 받는다면 단순 배열의 형태나 배열안에 객체가 담겨서 올 수도 있겠죠.
그럼 이때 dto를 어떻게 만들고 validation은 어떻게 해야할까요?
컨트롤러에 아래와 같이 라우트를 만들면 마음과 같이 나오지 않을겁니다.
@Post('many')
createMany(@Body() createCatDto: CreateCatDto[]): CreateCatDto[] {
  return createCatDto;
}
example도 그렇고 뭔가 뭉게져 있는 모습을 볼 수 있죠.
nestjs의 공식문서는 다음과 같은 방법을 제시하고 있습니다.
@ApiBody({ type: [CreateCatDto] })
@Post('many')
createMany(@Body() createCatDto: CreateCatDto[]): CreateCatDto[] {
  return createCatDto;
}
그럼 잘 나오게 될겁니다.
하지만.. validation이 안되는 걸 확인할 수 있습니다.
몇가지를 뺴서 전송해보세요. 그럼 에러없이 값을 반환하는 모습을 볼 수 있습니다.
나는 문서도 잘나오고 validation도 하고 싶은데 그럼 어떻게해야할까요?
DTO를 추가해봅시다.
export class ArrayCreateCatDto {
  @ApiProperty({
    description: 'The datas of a cat',
    required: true,
    type: [CreateCatDto],
  })
  @ValidateNested({ each: true })
  @Type(() => CreateCatDto)
  @IsArray()
  data: CreateCatDto[];
}

@Post('many')
createMany(@Body() createCatDto: ArrayCreateCatDto): ArrayCreateCatDto {
  return createCatDto;
}
이렇게 dto를 만들고 컨트롤러에 타입을 지정해주면 data key값 안에 배열 형태로 고양이정보의 객체가 있는 모습을 볼 수 있습니다.
또한 validation도 잘 되는 것을 볼 수 있습니다.
단순이 string[]의 형태로 하고 싶다면 아래와 같이하면 됩니다.
export class OnlyArrayDto {
  @ApiProperty({
    isArray: true,
    example: ["a", "b"],
  })
  @IsArray()
  @IsNotEmpty({ each: true })
  @IsString({ each: true })
  prescription_ids: string[];
}
Controller
@ApiTags("cats")
@Controller("cats")
export class CatsController {
  private cats: CatsDto = {
    id: 1,
    name: "Kitty",
    age: 3,
    breed: "Scottish Fold",
  };

  @ApiCreatedResponse({
    description: "생성된 고양이를 반환합니다.",
    type: CatsDto,
  })
  @ApiOperation({
    summary: "고양이 생성",
    description:
      "이 API는 새로운 고양이를 생성합니다.<br/>고양이의 이름, 나이, 품종을 입력하세요.",
  })
  @Post()
  create(@Body() createCatDto: CreateCatDto): CatsDto {
    return this.cats;
  }
}
ApiTags
api 태그는 api의 문서를 볼 때 그룹을 만들어줘서 구분하기 편하게 해줍니다.
ApiOperation
api가 어떤 용도로 쓰이는지 좀더 상세하게 기재할 수 있습니다.
주로 summary, description, deprecated를 사용합니다.
응답 데코레이터
예상되는 응답코드를 지정해줘서 예상되는 성공이나 실패에 관한 내용을 작성할 수 있습니다.
예시에서는 성공에 대한 데코레이터만 사용했습니다.
성공 응답 데코레이터
| 응답코드 | |
|---|---|
| @ApiOkResponse() | 200 OK - 요청이 성공적으로 처리됨. |
| @ApiCreatedResponse() | 201 Created - 요청이 성공적으로 처리되어 새로운 리소스가 생성됨. |
| @ApiAcceptedResponse() | 202 Accepted - 요청이 접수되었으나, 처리가 완료되지 않음. |
| @ApiNoContentResponse() | 204 No Content - 요청이 성공적으로 처리되었으나, 컨텐츠를 반환하지 않음. |
| @ApiMovedPermanentlyResponse() | 301 Moved Permanently - 요청한 리소스의 URI가 변경되었음. |
| @ApiFoundResponse() | 302 Found - 요청한 리소스가 일시적으로 다른 URI로 변경되었음. |
클라이언트 에러 응답 데코레이터
| 응답코드 | |
|---|---|
| @ApiBadRequestResponse() | 400 Bad Request - 서버가 요청을 이해할 수 없음. |
| @ApiUnauthorizedResponse() | 401 Unauthorized - 요청이 인증을 필요로 함. |
| @ApiNotFoundResponse() | 404 Not Found - 요청한 리소스를 찾을 수 없음. |
| @ApiForbiddenResponse() | 403 Forbidden - 서버가 요청을 거부함. |
| @ApiMethodNotAllowedResponse() | 405 Method Not Allowed - 요청한 메소드는 허용되지 않음. |
| @ApiNotAcceptableResponse() | 406 Not Acceptable - 요청한 리소스의 미디어 타입이 클라이언트에 의해 허용되지 않음. |
| @ApiRequestTimeoutResponse() | 408 Request Timeout - 서버가 요청을 기다리다가 타임아웃 됨. |
| @ApiConflictResponse() | 409 Conflict - 요청이 서버의 현재 상태와 충돌. |
| @ApiPreconditionFailedResponse() | 412 Precondition Failed - 서버가 요청의 전제 조건을 만족하지 못함. |
| @ApiTooManyRequestsResponse() | 429 Too Many Requests - 클라이언트가 지정된 시간 동안 너무 많은 요청을 보냄. |
| @ApiGoneResponse() | 410 Gone - 요청한 리소스가 영구적으로 이동되었으며, 더 이상 사용할 수 없음. |
| @ApiPayloadTooLargeResponse() | 413 Payload Too Large - 요청 페이로드가 너무 큼. |
| @ApiUnsupportedMediaTypeResponse() | 415 Unsupported Media Type - 요청이 지원되지 않는 미디어 타입임. |
| @ApiUnprocessableEntityResponse() | 422 Unprocessable Entity - 요청 구조는 올바르나, 의미상 오류가 있어 처리할 수 없음. |
서버 에러 응답 데코레이터
| 응답코드 | |
|---|---|
| @ApiInternalServerErrorResponse() | 500 Internal Server Error - 서버가 요청을 처리할 수 없음. |
| @ApiNotImplementedResponse() | 501 Not Implemented - 서버가 요청된 기능을 수행할 수 없음. |
| @ApiBadGatewayResponse() | 502 Bad Gateway - 서버가 게이트웨이나 프록시 역할을 하며, 상위 서버로부터 잘못된 응답을 받음. |
| @ApiServiceUnavailableResponse() | 503 Service Unavailable - 서버가 일시적으로 요청을 처리할 수 없음, 일반적으로 유지보수 또는 과부하로 인해 발생. |
| @ApiGatewayTimeoutResponse() | 504 Gateway Timeout - 서버가 게이트웨이나 프록시 역할을 하며, 상위 서버로부터 응답을 적시에 받지 못함. |
기타 응답 데코레이터
| 응답코드 | |
|---|---|
| @ApiDefaultResponse() | 일반적으로 예상치 못한 다른 모든 종류의 에러 상황을 문서화할 때 사용됩니다. 이는 특정 HTTP 상태 코드에 국한되지 않고, 다양한 종류의 에러 응답을 나타낼 수 있는 기본 응답을 의미합니다. |